
COVID-19: Build Your Own Local Delivery Online Store
We’ve written this super simple guide on how to set up your own online store with Shopify in under an hour and for no upfront cost. Whether you’re a restaurant selling meals or a store selling goods, this guide shows you how to offer your products for local delivery.
After the government’s recent announcement, we do not advise offering a collection service. This guide is for offering a local delivery service without using a carrier – i.e. you or your staff deliver the goods yourself.
Before we begin, the great news is that Shopify have extended their free trial to 90 days to help businesses like yours get online. You’ll need to enter your credit card details but you won’t get charged during your trial. They’ve also extended gift card support to all Shopify plans meaning you can immediately sell gift cards to help with your cashflow.
So the first thing you need to do is to signup for a free Shopify trial by clicking this link:
Just so you know, this is an affiliate link so we’ll receive a small amount of commission should you eventually pay for Shopify after your 90 day free trial. You won’t be charged any more than normal.
When you sign up you will be asked to provide a store name as shown below:

This will become the URL for your store. So in our example above, this will become fredsfishnchips.myshopify.com. If you wish, you can buy a proper domain name like fredsfishnchips.com but this will cost around £12 a year. If you want to set up a store for your existing customers then they probably won’t mind the myshopify.com domain.
Once you are all signed up you will automatically be logged in to your very own online store! Now before we can start selling online we’ve got a few things to do, namely adding your products, customising the look and feel of your store and editing the automatic emails that get sent out…
Adding products
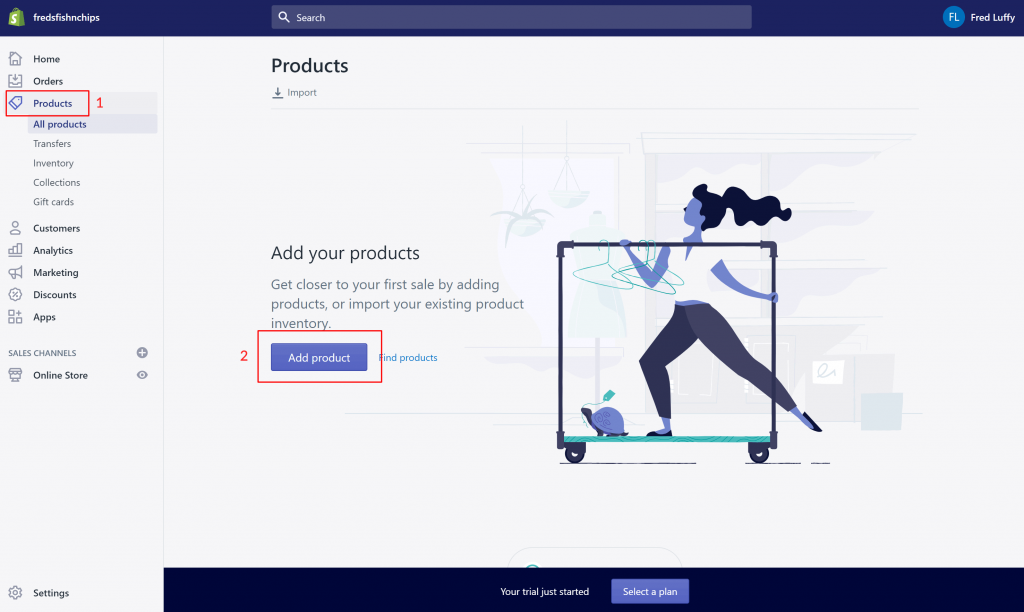
Let’s get adding some products for your customers to buy. Click “Products” (1) on the main menu on the left and then click the big blue “Add product” (2) button:
Technically there’s only four things you have to fill out here. The product title (1), description (2), add an image (3) and the price (4):

There’s some other bits that you might also want to fill out which we’ll take you through…
Inventory
This will mostly be useful to you if you have limited quantities of the product in stock. You can give it an SKU (1) if you wish. If you click “Track quantity” (2) the quantity section will appear and you can enter the quantity available (3). If you do this then every time someone purchases a product the quantity will go down. If it gets down to zero then the product will become unavailable.

Shipping
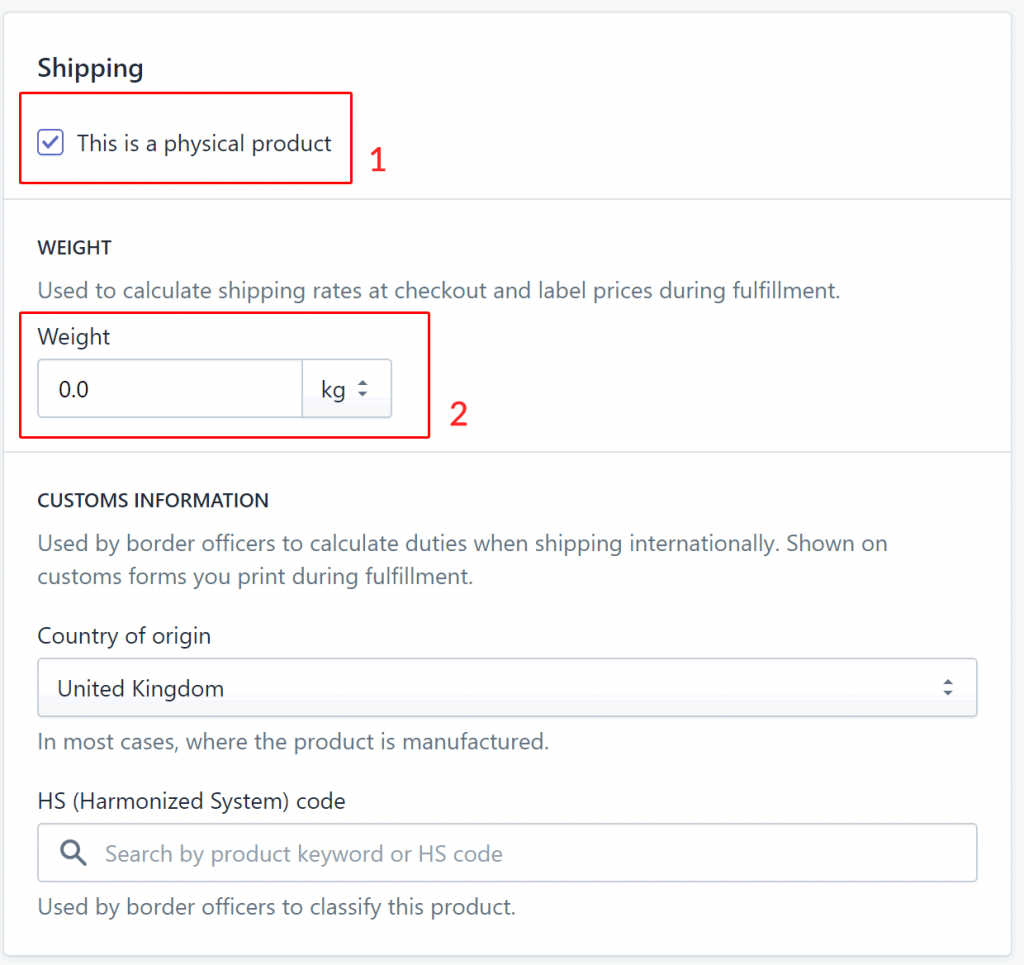
This is only really of concern to you if the product is going to be shipped via a shipping service such as DPD. If you’re a restaurant and you’re delivering yourself or offering a collection service then you don’t really need to use this.
If you do, just click “this is a physical product” (1) and enter its weight (2):
Variants
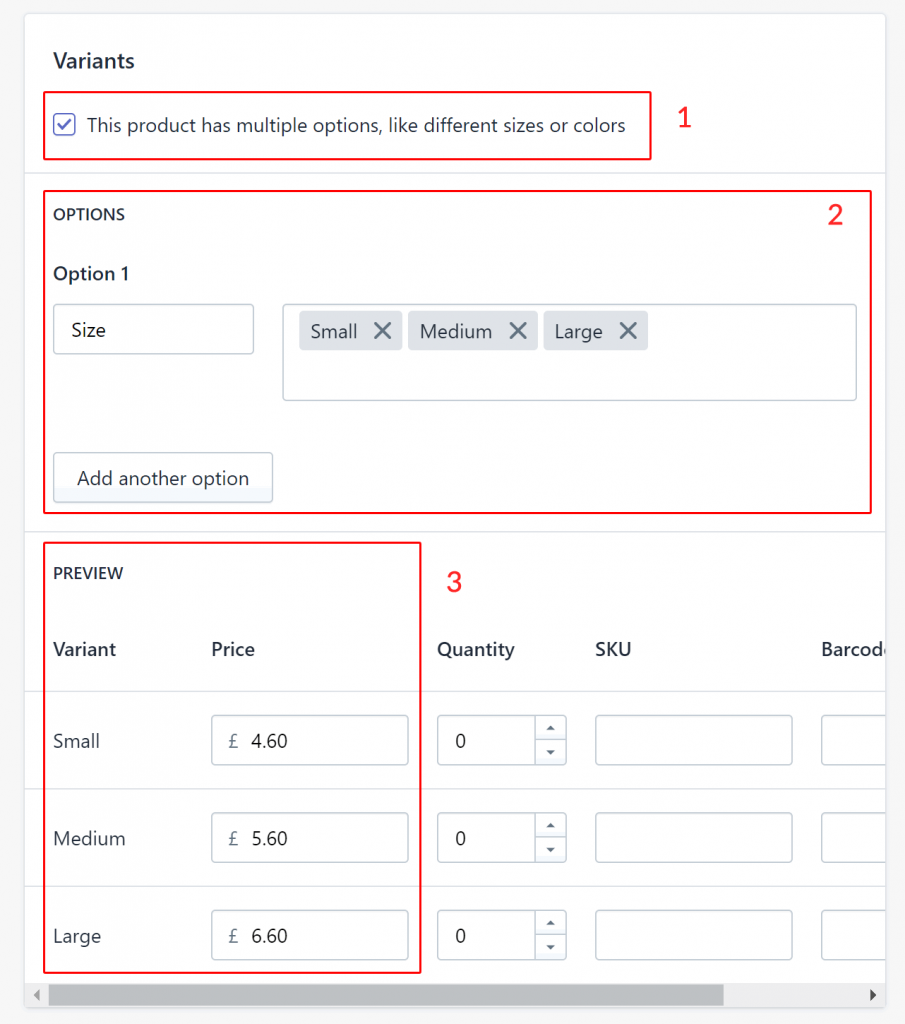
This is where you can give different combinations of variants for a single product. If you want to do this, click “This product has multiple options, like different sizes or colors” (1). In the example below we’ve added one option – size (2). When you’ve added your variants, they will appear in the “Preview” section (3) where you can add different prices and quantities if required:
When you’re done adding your product, click the blue “Save” button on the top right hand corner. Of course you will probably want to add a few more products which you can do in exactly the same way.
Look and feel
Now we’ve added our products, it’s time to have a play with how our actual online store looks.
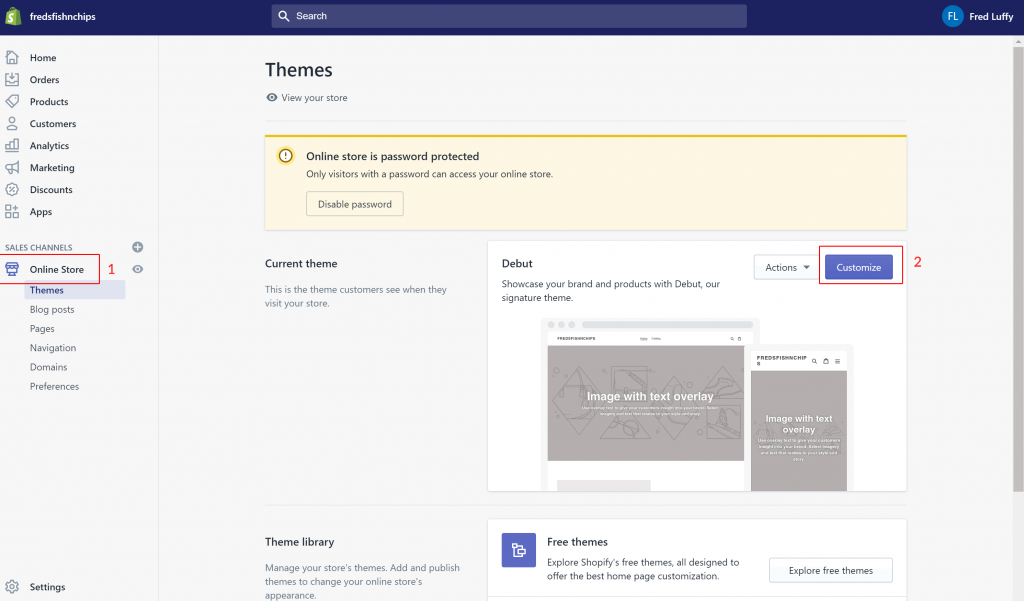
Click “Online store” (1) and you’ll end up on the theme page. A theme is the template your webstore uses. You could buy a completely different theme if you like but for this simple tutorial we’ll just stick with the default one. So click the blue “Customize” button (2) to customize the default theme.
So here we are in Shopify’s theme customizer:
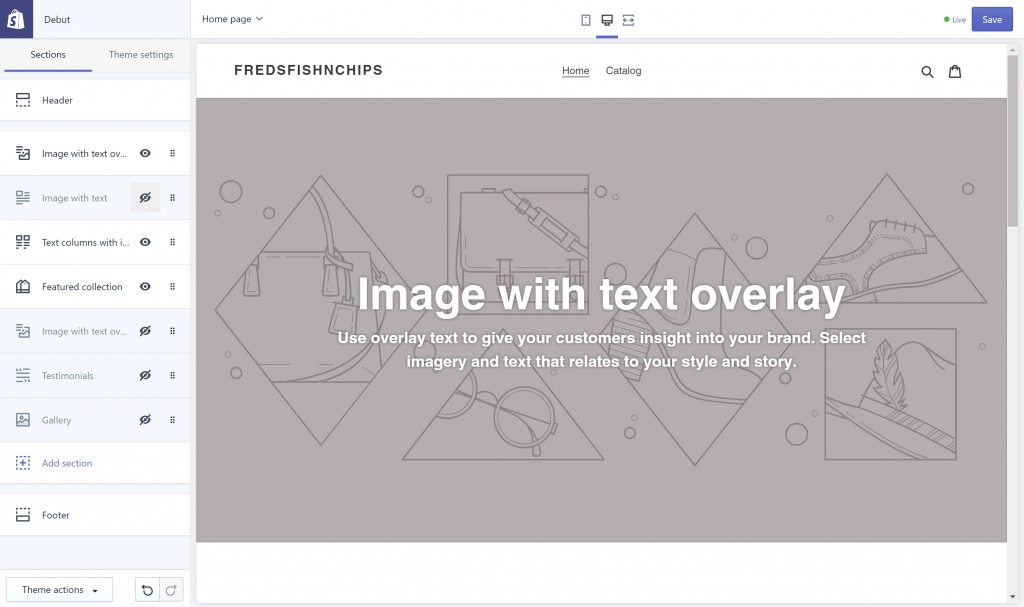
The first thing we’ll do is edit the header, so click “Header” on the left.
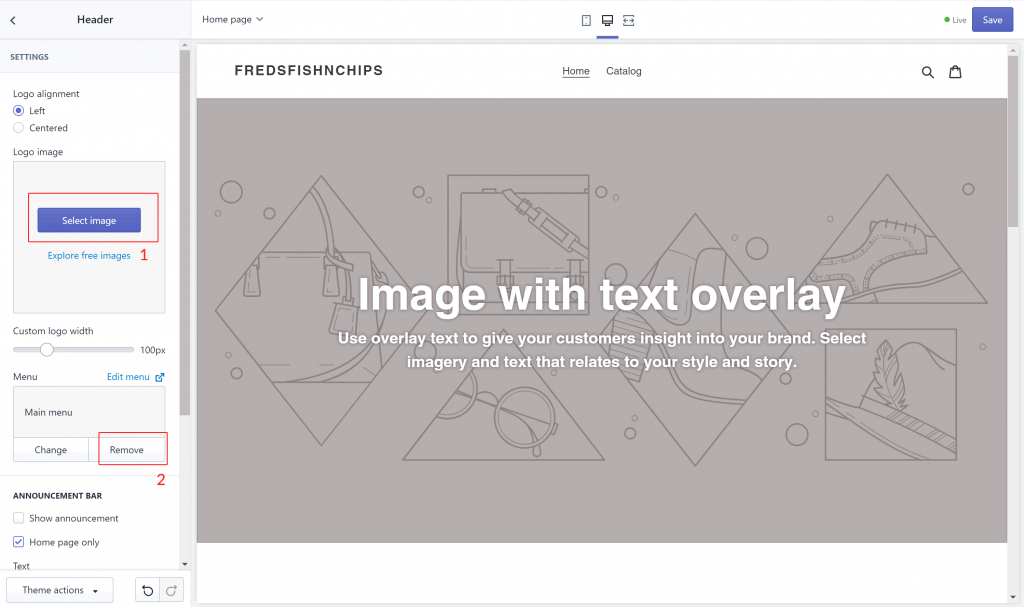
Add your logo by clicking the blue “Select image” button (1). We’re going to keep this store really simple so remove the menu by clicking “Remove” under “main menu” (2):
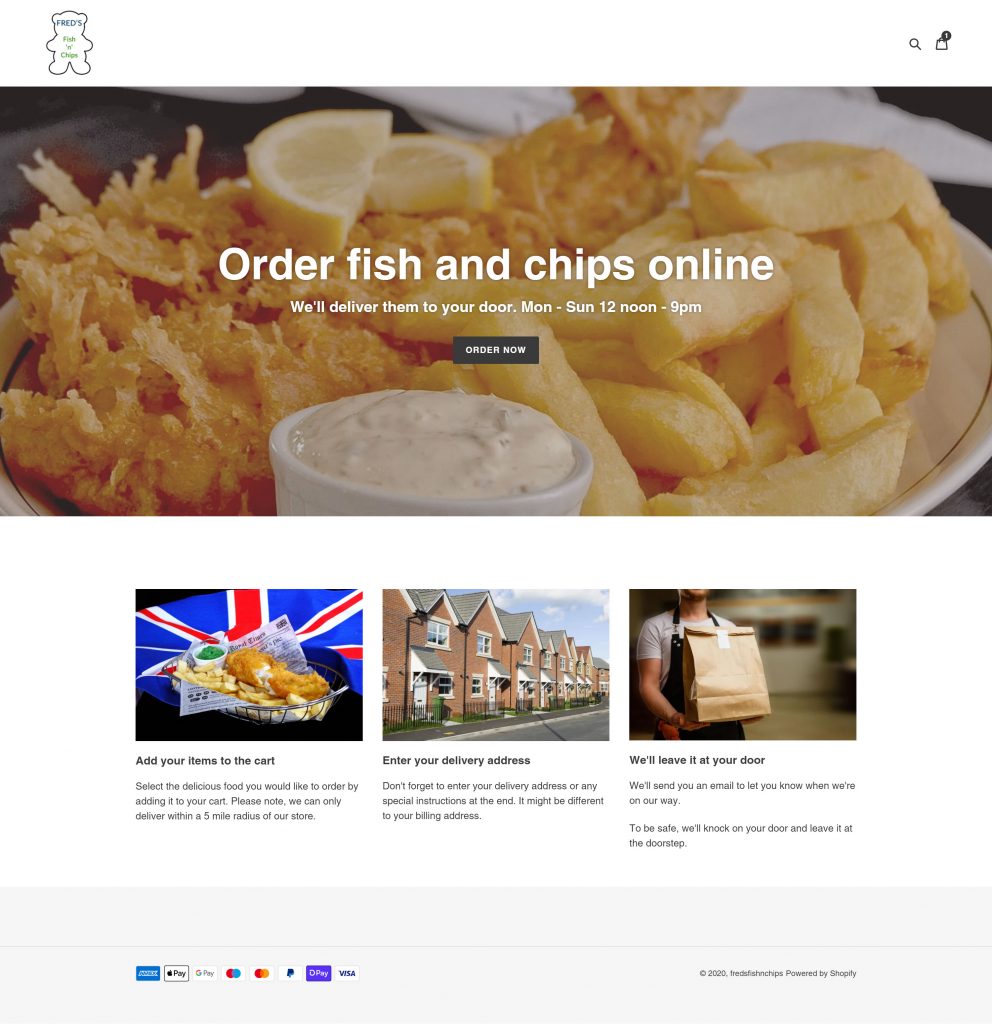
When you’re done, you should have something that looks like this:
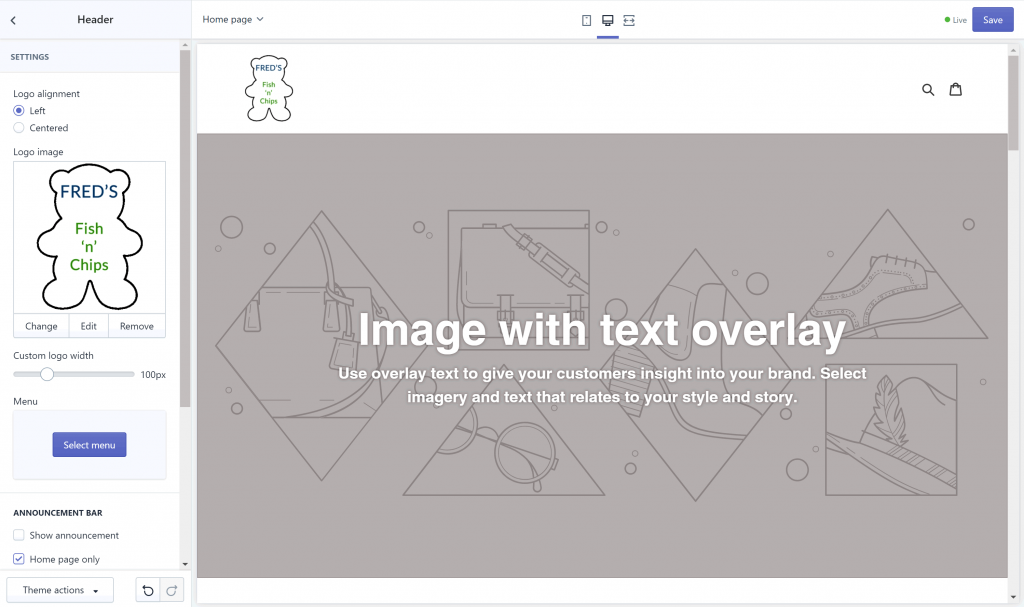
Go back to the main screen by clicking the left arrow on the top left corner.
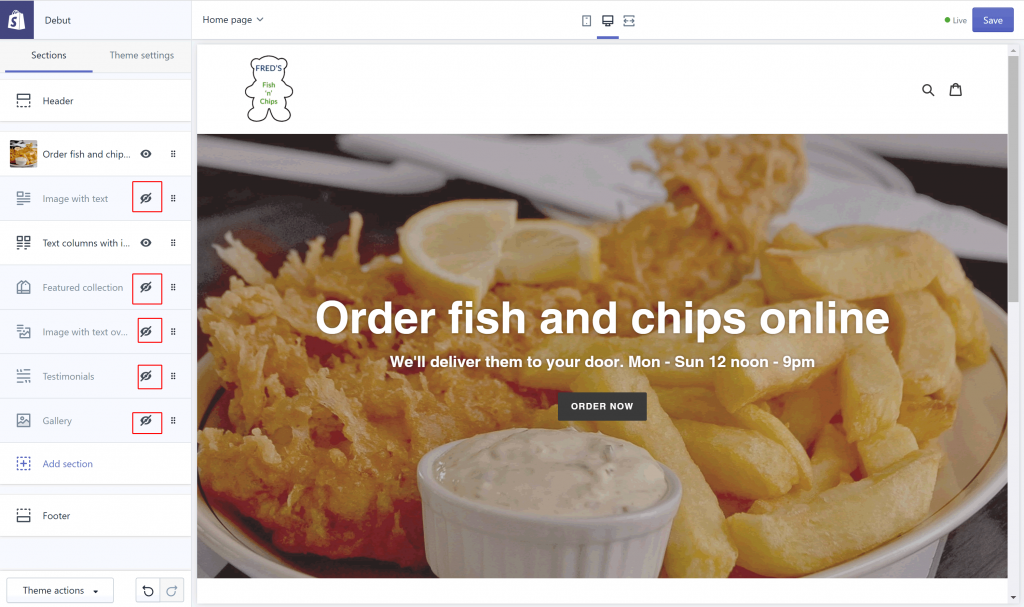
Next we’ll change that big image and text so click “Image with text overlay” directly beneath where it says “Header”.
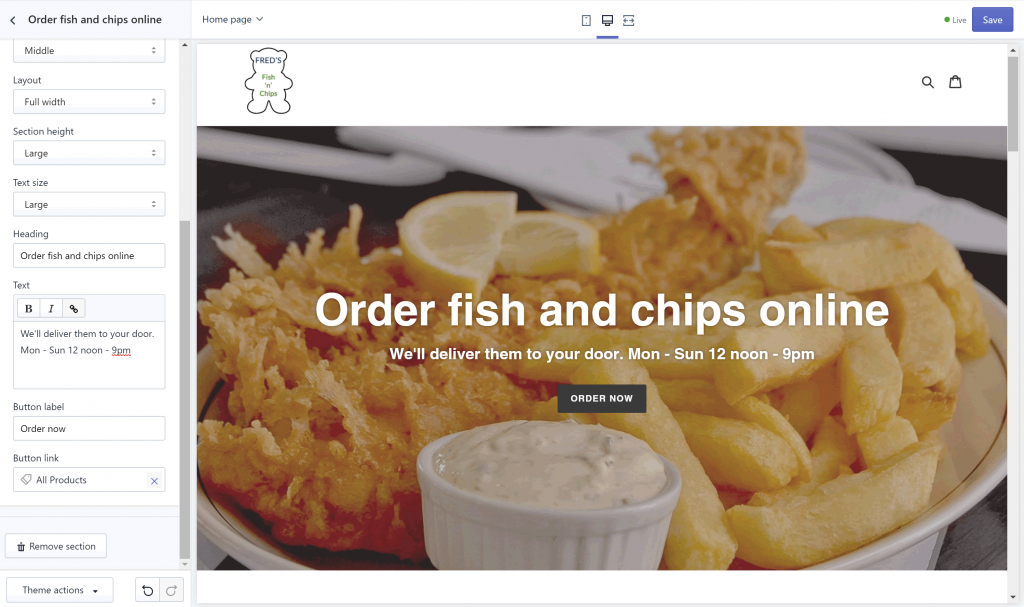
In this section, select a nice big image, add a heading and text, add a button label with something like “Order now” and select “All Products” for the Button Link to take your visitors to your product selection. Things are starting to take shape! You should now have something like this:
Once again, click the left arrow on the top left to go back.
Next we’re going to remove everything else from the homepage other than “Text columns with images” because we don’t really need them. Click the eye icons shown below:
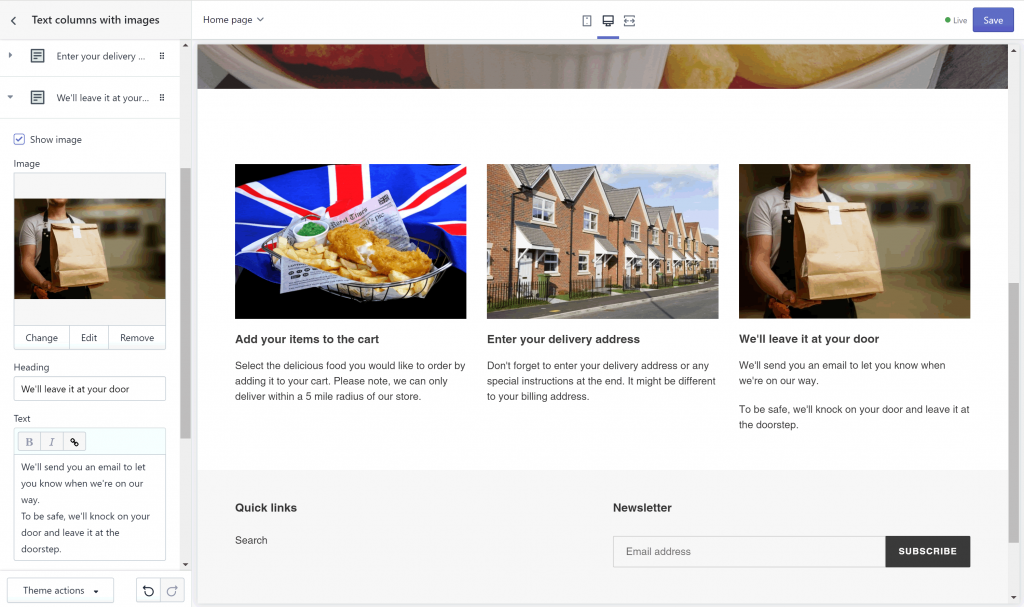
Now click ““Text columns with images” so we can edit this with some useful information for your customers.
You edit each column by clicking the bit where it says “Add a title or tagline”. The section will expand and you can edit the image, heading and text. There’s also the option to add a button.
We’ll edit ours to explain the ordering process as shown below:
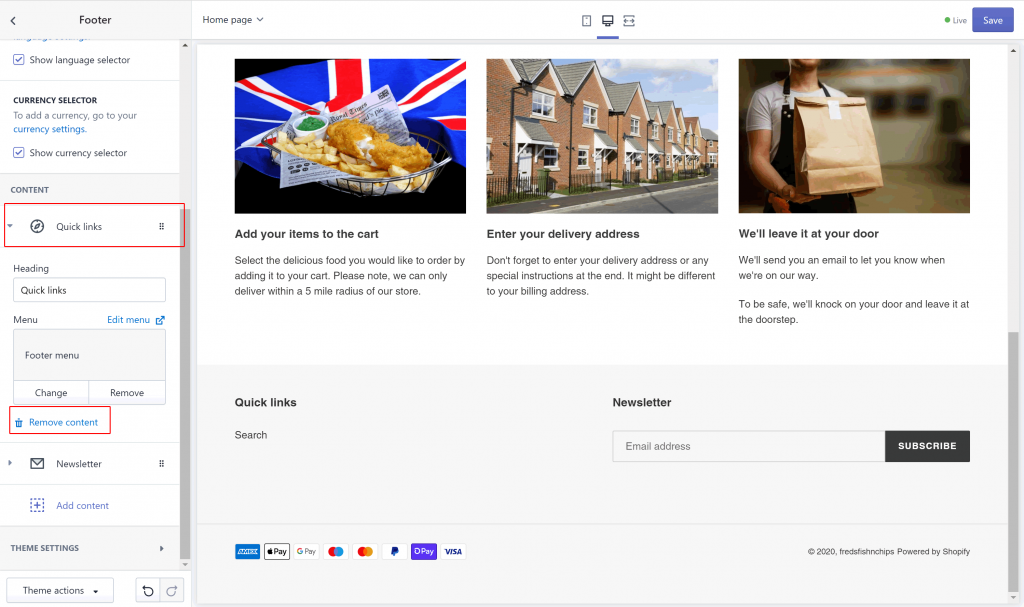
Once again, click the left arrow on the top left to go back. Next, we’ll get rid of the quick links and newsletter sections from the footer.
So, click “Footer” and then expand “Quick links” and click “Remove content”. Do the same for “Newsletter”:
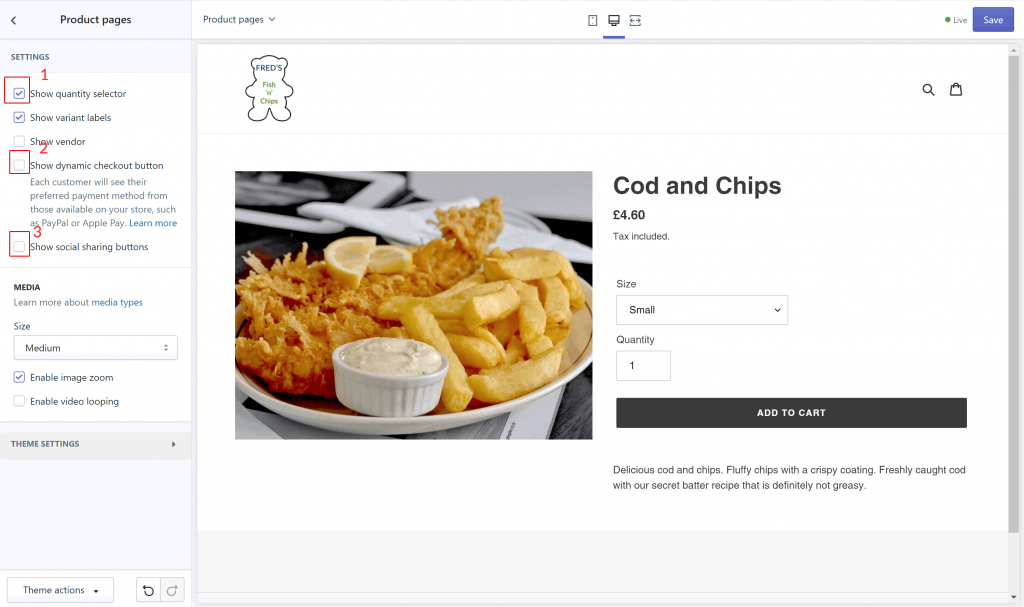
We’re done with our homepage! Looking good! Let’s make a few changes to our product page. Click the drop down at the top and select “Product pages”:

Click the “Product pages” option from the menu on the left and make the following changes:
- Select “Show quantity selector” (1)
- Unselect “Show dynamic checkout button” (2)
- Unselect “Show social sharing buttons” (3)
While you’re on the product page, try adding a product to the cart. That way, when we make a small modification to the cart page in just a sec, you’ll see what it looks like.
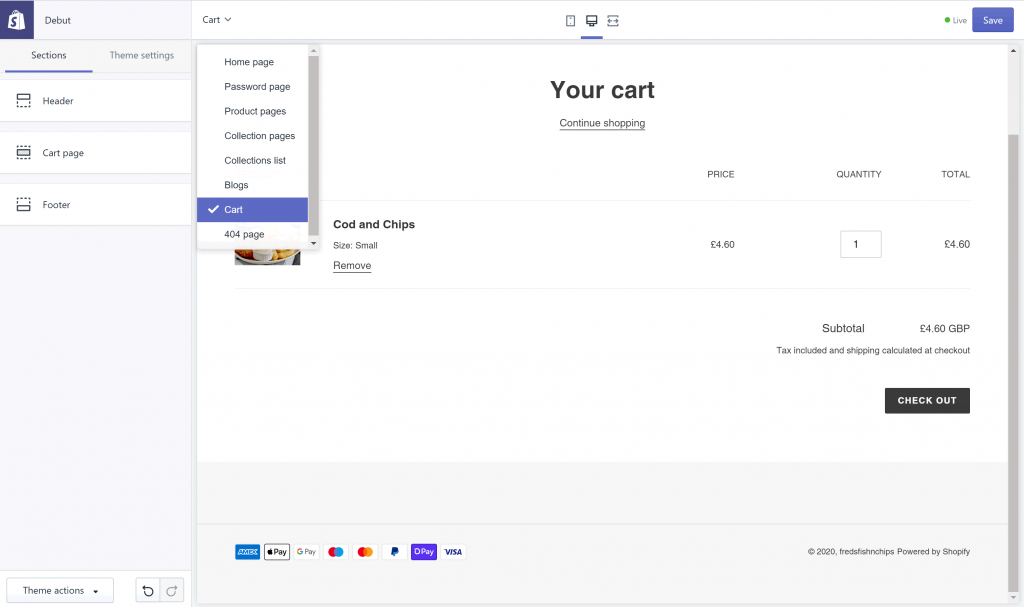
Let’s make that very small change to the cart page. Select “Cart” from the drop down:
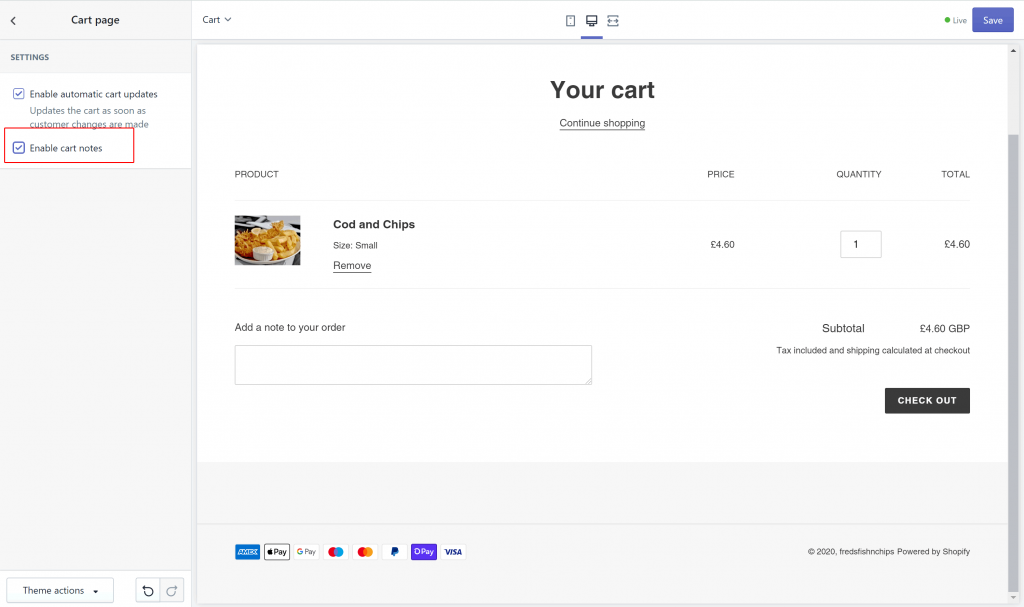
Select “Cart page” from the left hand menu and then click “Enable cart notes” so your customer can add notes regarding their order:
And that’s it! We’re done with customising your theme. Click the blue “Save” button on the top right hand corner to save your handy work.
Now click the left arrow on the top left corner and then click the Shopify icon in the same position to go back to your main Shopify area.
Automatic Emails
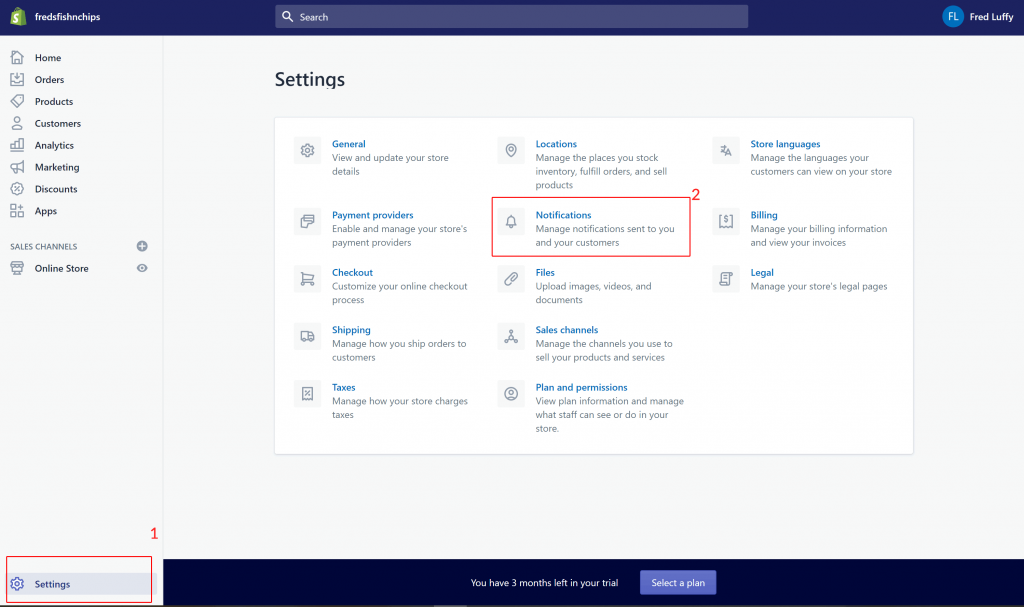
The final thing to do is to modify the automatic emails that Shopify sends out to your customers. Start by clicking “Settings” and then “Notifications”:
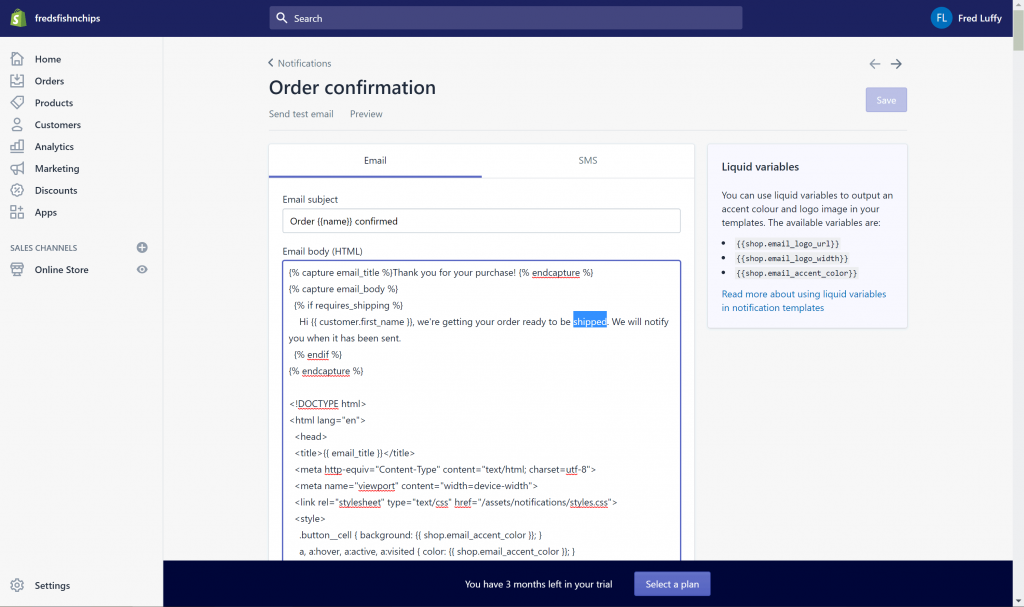
This is where we can edit all the emails that get sent out. The first one we want to edit is “Order confirmation” which is sent out as soon as a customer creates an order:

All we really want to do is to replace the word “shipped” with “delivered” and then click save:
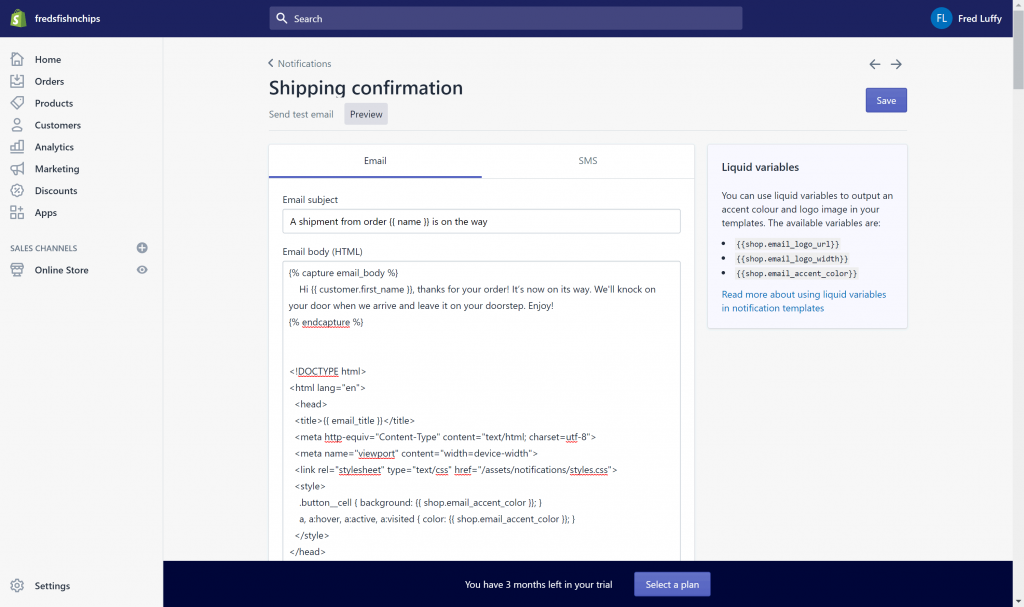
Click the “< Notifications” link at the top of the page to go back. Now click on the link for “Shipping confirmation” in the “Shipping” section. This is the email that will be sent when the ordered is being delivered.
This time, delete all of this highlighted text:

And replace it with this:
{% capture email_body %}
Hi {{ customer.first_name }}, thanks for your order! It’s now on its way. We'll knock on your door when we arrive and leave it on your doorstep. Enjoy!
{% endcapture %}
So we end up with this:
Click save and we’re all done. Now to open your store!
Open your store
So you know that bar that’s been following you around on every page? You can see it in the last screenshot – it says “You have 3 months left in your trial”. You’re going to need to click the blue “Select a plan” button.
On the next screen, you can select your Shopify plan. You should be absolutely fine with a “Basic Shopify” plan which as shown costs $29 per month. But don’t worry! You won’t be charged a penny until the end of your massive 90 day trial which fingers crossed is enough to get us through the Coronavirus pandemic.
Click the blue “Choose this plan” button and go through the process to select the plan. You will need to enter your credit card or PayPal details but as previously mentioned, these won’t be charged.
Once you’re done with this, click back to your “Online Store” (1) settings and then click “Disable password” (2):
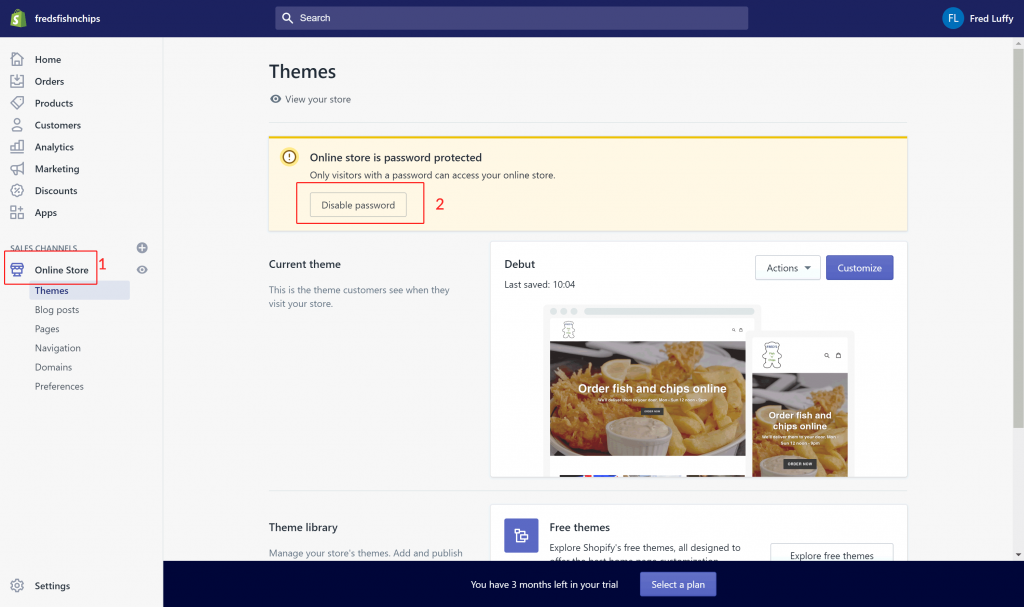
On the next screen, uncheck “Enable password” and click save. You’re open for business!
Your store URL is [yourstorename].myshopify.com. In our example, it’s fredsfishnchips.myshopify.com.
Handling orders
When a customer places an order, you will receive an email to the address you signed up with.
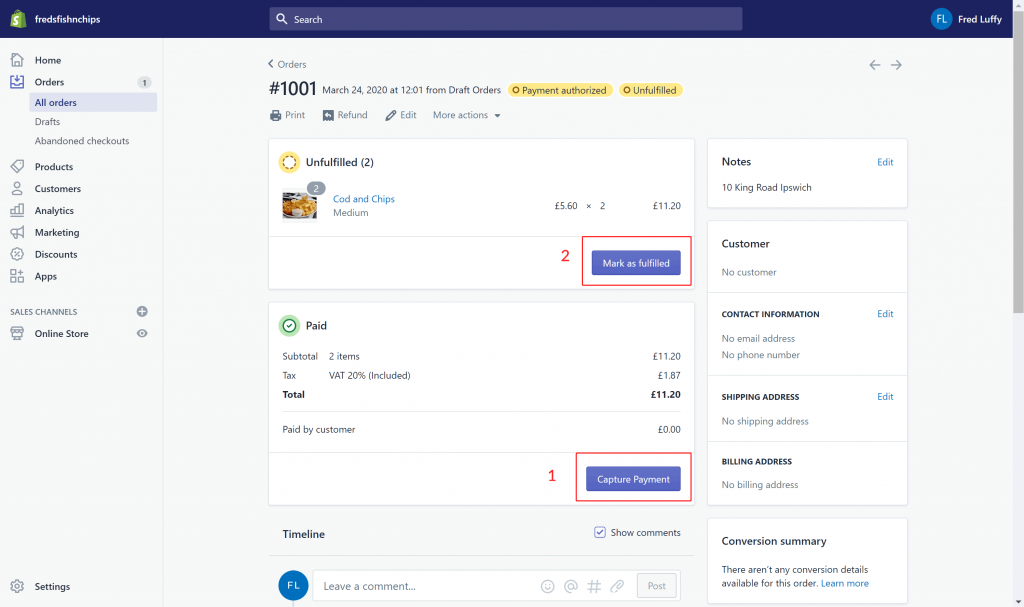
You can also log in to your store and see them in the orders section:
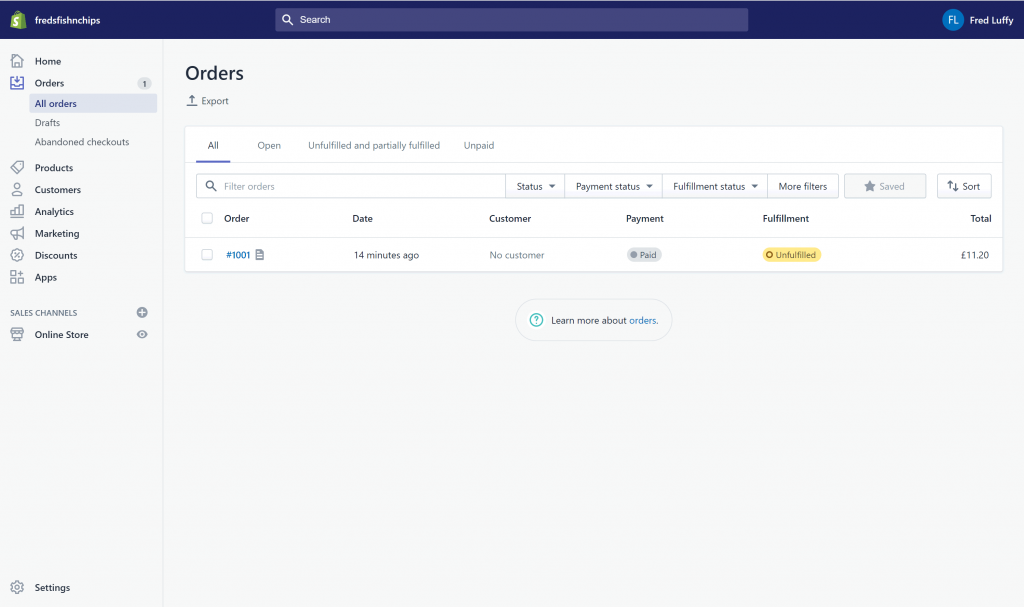
View the order by clicking on it. You’re probably going to want to take a look at what has been ordered so you can get cooking or getting the order together. Once it’s ready to be delivered, click “Capture Payment” (1) to take the payment from the customers card. Then, click “mark as fulfilled” and finalise the fulfillment of the order. This will send the delivery email out to the customer and mark the order as fulfilled in the system.
And that’s it! You’re all set!
Credit to Katie Cerar, Senior Product Lead at Shopify Plus who originally published this guide for creating a “curbside pickup” store which we have adapted for this.
For information on how to do anything else with your new Shopify store, take a look at the help center.
These guides are particularly useful:
Selling gift cards – https://help.shopify.com/en/manual/products/gift-card-products
Using the Shopify app (so you get order notifications to your phone) – https://help.shopify.com/en/manual/apps/apps-by-shopify/shopify-app/using-the-shopify-app
Finally, if you need a little hand with Shopify then do contact us by the usual methods. Good luck in these crazy times!